Ladies, if you’re dreaming of fuller, longer, and more defined lashes without relying on extensions or makeup every morning – I feel you. I’ve always admired that effortless lash lift look, but frequent appointments and the cost of professional treatments were simply not for me. That’s when I started looking into at-home lash lift and lamination options. What I found was a total game-changer: the Nanolash Lash Lift Kit.
I’ll be honest – when I first heard you could lift and laminate your lashes at home, I was skeptical. Could a DIY lash lift and lamination really give the same results as a professional treatment? Would it be safe? Would it work on my lashes, which were still recovering after years of wearing extensions? I decided to find out for myself.
My Lash Story Before Nanolash Lash Lift Kit
Before diving into the process, let me give you a little background on my lashes. I wouldn’t say they were completely ruined, but they were far from healthy. Short, straight, and brittle, they lacked any sort of curl or shine. Previous extensions had made things worse – my natural lashes were fragile and thin, and mascara barely made a difference anymore.
That’s why the idea of reviving my lashes naturally with an at-home lash lamination kit sounded so appealing. I didn’t just want a curl – I wanted nourishment, volume, and strength.
So when I came across the Nanolash Lash Lift Kit, a complete treatment that you can use without any professional training, I had to give it a try.
What’s Inside the Nanolash Lash Lift Kit?
If you’ve ever used anything from Nanolash before, you’ll know the brand is all about performance and quality. I’ve tried their lash serum and mascara before, and both really impressed me. That’s why my expectations were high – and honestly, they were exceeded.
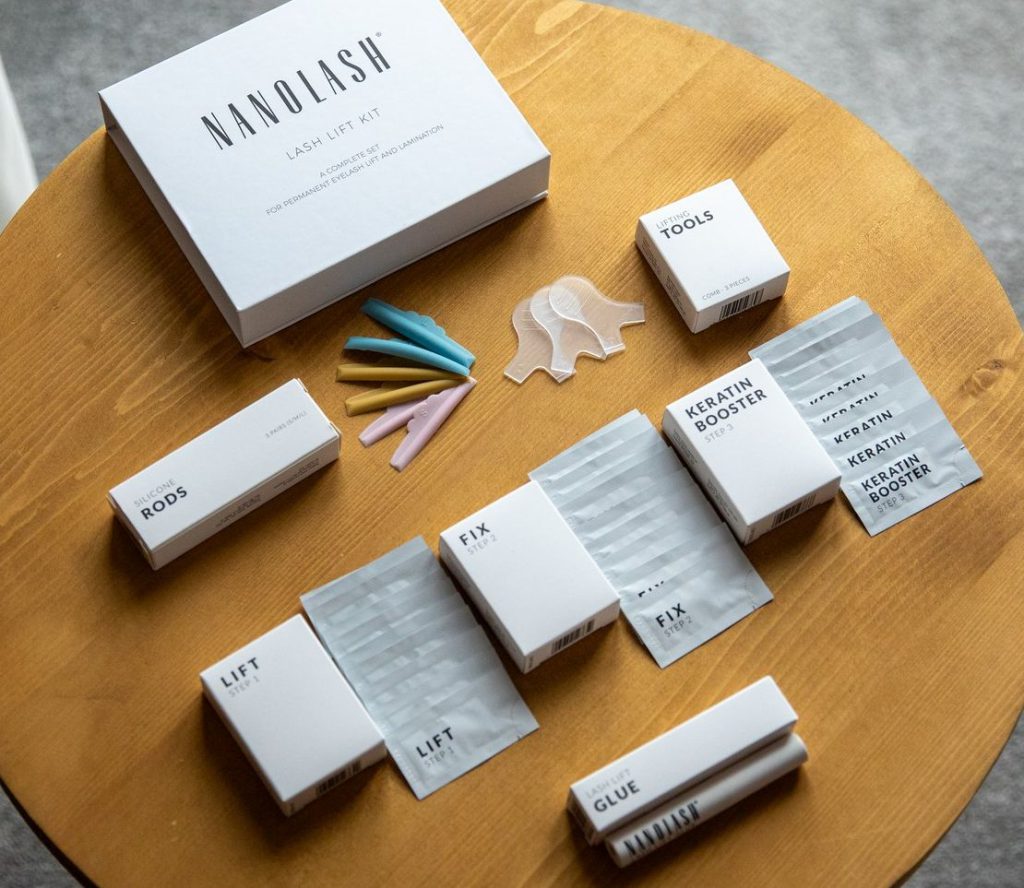
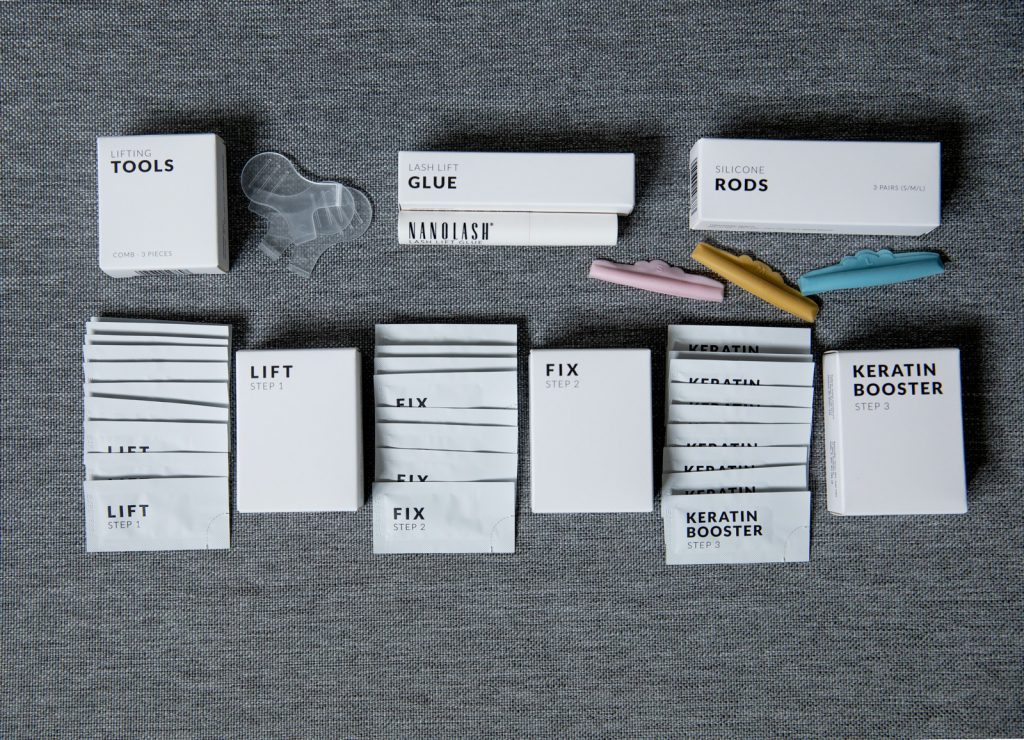
The packaging was sleek, and everything was neatly arranged. The kit includes everything you need for up to 10 full treatments, which is incredible value. Here’s what I found inside:
- Lift – Step 1: 10 sachets
- Fix – Step 2: 10 sachets
- Keratin Booster – Step 3: 10 sachets
- Three pairs of silicone rods in sizes S, M, and L
- Lash Lift Glue for attaching the rods
- Additional tools
What immediately caught my eye, though, was the formula. These aren’t just products to curl your lashes—they actually care for them. Coconut oil, grape seed oil, and vitamins are all part of the formula, which makes it more than just a beauty treatment – it’s lash care and styling in one.
Performing the Lash Lift at Home – My Experience
I’m not going to lie, I was nervous at first. The idea of applying multiple steps near my eyes made me pause. But the instructions were crystal clear, and once I laid everything out in front of me, I felt much more confident.
Here’s how it went:
- I started with clean, makeup-free lashes.
- I separated my lower lashes using the included tools.
- I chose the M-size rods (a good middle ground for my short lashes) and applied them as close to the lash line as possible using the glue.
- Then came the actual lift: I applied Step 1 (Lift) and left it on for 10 minutes.
- I removed it and repeated the same with Step 2 (Fix).
- Lastly, I nourished my lashes with Step 3 (Keratin Booster).
The whole process took about 35-40 minutes, and it honestly flew by. There was no stinging, no irritation – everything felt surprisingly gentle.
The Results? I Was Shocked
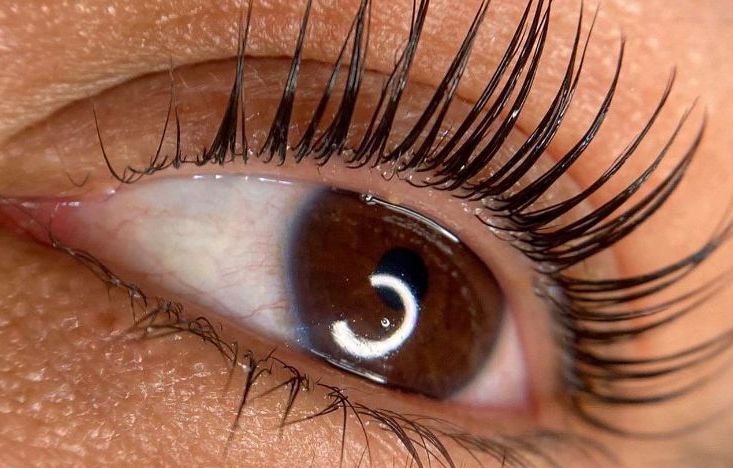
When I removed the rods, I nearly gasped. My lashes were curled, lifted, and looked at least twice as long. They had this glossy, dark finish like I’d just applied a fresh coat of mascara – only it was all natural.
But what really blew me away was how soft and flexible they felt. There was no dryness or stiffness, and I could tell right away that the nourishing ingredients were doing their job.
The best part? The results lasted weeks. I’m currently in my fourth week since doing the treatment, and my lashes are still looking lifted and healthy. Even on no-makeup days, I feel confident and polished.
Final Thoughts: Is the Nanolash Lash Lift Kit Worth It?
Absolutely – this is hands-down one of the best beauty products I’ve used this year. If you’re someone who wants beautiful, lifted lashes without the ongoing costs and hassle of appointments, this is for you.
It’s easy to use, safe for beginners, and the effects are genuinely impressive. Plus, the added nourishment means you’re not just styling your lashes – you’re healing and strengthening them, too.
I’m already planning when to do my next DIY lash lift using the kit, and I honestly can’t imagine going back to extensions or daily mascara after this.
If you’ve ever wanted to try an at-home lash lift and lamination kit, don’t hesitate. Nanolash has nailed it.
Let me know in the comments if you’ve tried it – or if you have questions, I’m happy to share more about my experience!
Leave a Reply